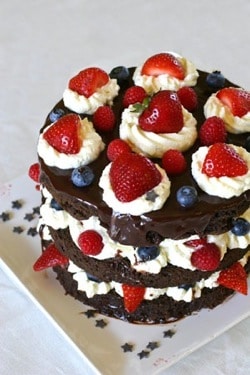
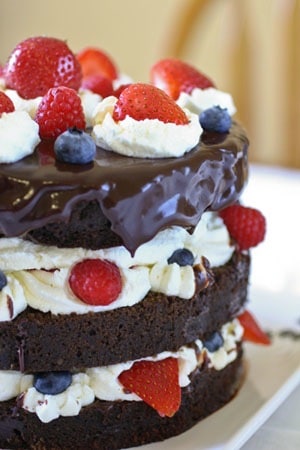
– How about a triple decker gluten-free Fourth of July cake? YES PLEASE! –
I have to say, I searched all over for gluten free recipes for a Fourth of July cake (and pink champagne cupcakes, but that’s another post). I wanted something new that I hadn’t prepared a thousand times before, and I wasn’t finding any inspiration in my current cookbooks. Sure there are a ton of recipes on the internet – some of which are amazing – but for some reason nothing that I’d found really turned me on.
I prayed to the gluten-free baking deities, and they sent me an angel in the form of a cute blond girl (because isn’t that how they’re always depicted?): for my birthday, my friend Michelle gave me a new book called Gluten Free Baking by Rebecca Reilly. For whatever reason the planets aligned and the stars began to smile upon my humble little kitchen. I was inspired, and I baked.
This recipe has almond flour in it, but shockingly enough, you can’t even tell in the finished product. There’s no grittiness or heaviness at all, and the end result is surprisingly moist while maintaining enough structure to hold the weight of several layers. The best part? Not a single person who ate my cake guessed that it was gluten free.
She shoots, she scores!
Once I had a recipe, I had to come up with a clever way to decorate my masterpiece (please – excuse my delusions of grandeur). My only limitation was that it had to be red, white and blue for the Fourth of July holiday. I’d been perusing the bakery at Whole Foods a few days prior, and their three layer cakes had left me a little weak in the knees. I’ve been feeling the overwhelming urge to create something gorgeous in the kitchen, something so pretty that even my stoic, master baker grandmother would be impressed. And indeed, she batted an eyelash when I showed her the photos. Yay, I accomplished my goal.
Note: when it comes to decorating, this Fourth of July cake should be a free-form experience. Have fun with the whipped cream and fruit. You don’t have to make it look like mine, and in retrospect I’d have avoided those weird little strawberry wedges poking out the sides between the layers. If you want to make something similar, though, I’ve included decorating directions below.
Three Tier Gluten-Free Fourth of July Chocolate Cake
Ingredients
]For cake:
- 4 cups basic gluten free flour mix
- 1 cup unsweetened cocoa powder
- 2 cups brown sugar
- 1 cup almond flour
- 3 tablespoons aluminum-free baking powder
- 1/4 teaspoon baking soda
- 2 teaspoon Ener-G egg replacer (just the powder, not mixed with water)
- 1-1/2 teaspoon xanthan gum
- 1/4 teaspoon salt
- 3 cup hot milk (I heated mine up to about 150°F)
- 1 cup vegetable oil
- 2 teaspoon vanilla extract
For decorating:
- 2 batches homemade whipped cream (agave vanilla whipped cream recipe)
- 1 carton fresh strawberries cleaned, cored, and sliced in half
- One handful fresh blueberries
- One handful fresh raspberries
- 1/2 cup chocolate ganache warm and ready for pouring
Instructions
Make the gluten-free Fourth of July cake:
- Preheat oven to 350°F (176°C).
- Lightly grease your pans, either two 9″ pans or one super tall 9″ pan. Place a round 9″ parchment round in the bottom.
- Mix together flour mix, cocoa powder, brown sugar, almond flour, baking powder, baking soda, egg replacer, xanthan gum and salt.
- Whisk together hot milk, oil and vanilla.
- Slowly incorporate dry ingredients into the milk mixture, whisking until completely smooth.
- Pour batter into pan(s) and let sit for five minutes before placing in oven.
- If you’re using two 9″ pans, bake for 22 minutes or until an inserted toothpick comes out clean. If you’re using a single 9″ pan, bake for 50 minutes, or until an inserted toothpick comes out clean. Make sure you look at the very tip of toothpick – there should be no sticky batter!
- Let cake cool in pans for ten minutes, then turn out onto rack. Remove parchment and turn cake right side up. Cool completely.
Decorating the Cake:
- If you’re going to slice your cake horizontally, I’d recommend wrapping it tightly in plastic wrap and putting it in the refrigerator for two hours (ideally overnight) to firm up before slicing. This makes your cake easier to work with, as it will hold together much better while cutting.
- First off, you want to level your cake by removing the rounded top where it rose in the oven. You can either use a long serrated knife or a cake leveler. I use the leveler, because it’s a lot easier to make straight layers by walking the leveler in a sawing motion.
- If you poured all of your batter into a single 9″ pan, cut it into three layers of equal thickness.
- Place your base layer of cake onto a lazy Susan or other decorating surface.
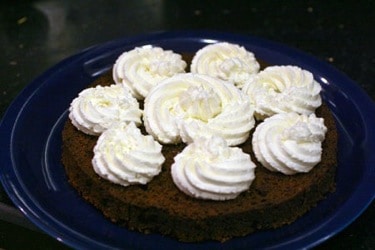
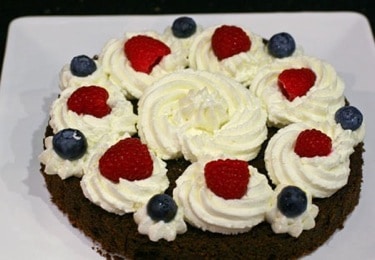
- Scoop whipped cream into a pastry bag, and using a large star tip of your choice, pipe a series of swirls around the edge of the cake, with a large swirl in the middle. It should look like this:
- Decorate by adding a piece of fruit into the middle of each smaller swirl. Do not add any fruit to the marge middle swirl.
- Add a small star between each swirl and top with a blueberry. When you’re done, it should look something like this:
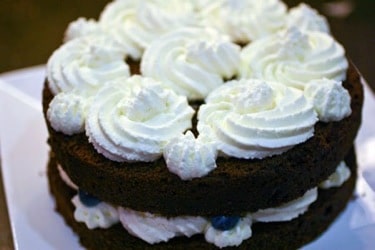
- If you have three layers, gently place the middle layer of cake on top of the decorated layer, making sure it’s straight and not leaning to one side. Decorate with whipped cream as you did the first layer:
- Decorate swirls with fruit as you did the first layer.
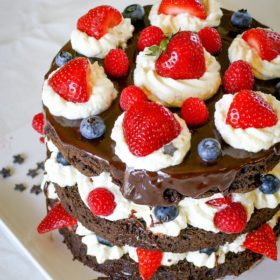
- Place final layer of cake on top of decorated layer, making sure it’s straight. Pour 1/2 cup ganache into the center of the cake, and using an icing spatula gently push it to the edges, allowing it to gently dribble over the sides. You don’t want a lot of ganache flowing all over the place – you just want a few drips as an accent.
- Set cake in the fridge for 20 minutes to set ganache.
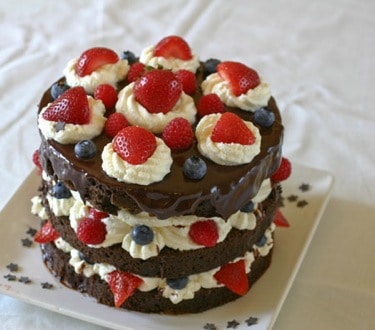
- Decorate the top of the cake with more whipped cream and fruit, like you did the other layers. When you’re done, push more fruit into the visible whipped cream between the layers where it needs a little color. When you’re done, you should have something similar to the photo below.
- This cake can be put in the fridge overnight to tighten up the whipped cream, which may droop and run in hot weather.
Notes
Nutrition
This content was originally posted on FearlessFresh.com.

