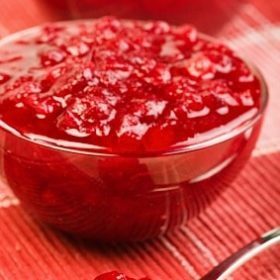
Late Summer Strawberry Vanilla Cranberry Jam Recipe
This strawberry cranberry jam recipe contains all the sweet-tart goodness you’ll need to celebrate the end of summer. A perfect crimson shade of seasonal change.
Servings 6 (eight ounce jars of jam)
Calories 108kcal
Ingredients
- 1 pound cranberries frozen is fine, as long as they’re defrosted
- 3 pounds very ripe strawberries hulled and cut into quarters
- 1 pound plus 1/4 cup sugar divided
- 1/4 teaspoon vanilla
- 3 tablespoons lemon juice
- 1/2 teaspoon butter
Instructions
- In a blender or food processor, pulse the cranberries until they are coarsely chopped. You do not want to puree them or chop them too small, as the goal is to maintain some of their firm cranberry texture. At this point, place a small plate in the freezer so you can test the jam for proper thickness later.
- Add chopped cranberries to a deep, heavy-bottom pot and toss them with 1/4 cup of sugar. Allow to sit for 1 hour. Stir in strawberries and let sit for another 15 minutes. Make sure your jars are sterilized and ready to go, and start a very large pot of water to boil on the stove for processing your filled jars. Keep the pot of water covered tightly.
- Mash the fruit slightly with a potato masher to break up the strawberries a bit. Add remaining ingredients to the pot with the fruit, stirring well to combine. Cook over medium heat until the fruit begins to bubble and spit furiously. (This is why you want to use a deep pot!) Skim off any foam that forms with a skimmer. Cook for about 20 minutes, stirring frequently to keep the jam from burning to the bottom of the pot.
- After 20 minutes, begin testing the jam. Spread a 1/2 teaspoon of cooked jam on the cold plate and set it back in the freezer. Wait 30 seconds, then run your finger through the jam. Is it thick enough to maintain the path made by your finger, or does it run all over the plate? If you’d like thicker jam, cook for another 4 minutes and test again. Repeat until the jam is as thick as you’d like, but don’t cook too long or you’ll drastically alter the taste of your jam.
- Working quickly, ladle jam into sterilized 8-ounce canning jars, leaving 1/4 inch of head space. Carefully wipe the rims of the jars to remove any clinging jam before you screw on the tops and rings – only screw them to finger-tight or you will hinder the vacuum process that seals the jars. Process in the large pot of boiling water for 10 minutes to guarantee sterilization and to ensure a good seal.
- Fold a large towel in half and lay it on the counter. Carefully remove jars from hot water using a jar lifter and set them on the towel. Allow the jars to sit undisturbed until they’ve reached room temperature, ideally overnight. Make sure not to jostle or bump the jars while they are warm, lest you break the seal. After a while, you’ll notice a very satisfying “ping” sound coming from the jars as the vacuum sets and the indentation on the lid pops inwards. If any jars have not sealed once they are completely cool – signified by the indentation in the lid not having popped down – store those jars in the refrigerator and eat within 2-3 weeks.
Nutrition
Serving: 2tablespoons | Calories: 108kcal | Carbohydrates: 27g | Sodium: 2mg | Potassium: 105mg | Fiber: 2g | Vitamin A: 50IU | Vitamin C: 46.2mg | Calcium: 10mg | Iron: 0.2mg