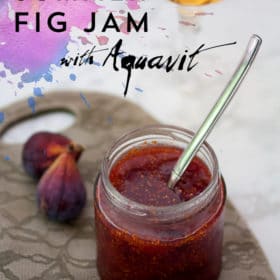
Summer Fig Jam Recipe with Aquavit
This fig jam recipe is an excellent partner for cheese plates, sandwiches, grilled meats, vanilla ice cream, addition to fruit pies and so on. Makes 6 cups of jam, give or take!
Servings 16 servings
Calories 303kcal
Ingredients
- 4 pounds figs diced
- 2 pounds granulated sugar
- 1 whole lemon juiced
- 1/3 cup aquavit
Instructions
- Place all the ingredients in a large, heavy bottomed pot and stir together. Cover and place in the fridge to macerate (the process of sugar pulling out the liquids of fruit) for at least an hour, but preferably overnight. This will result in less chance of your jam crystallizing (something that can happen if all the sugar isn’t melted when you cook the jam) and encourage a better flavor.
- Thoroughly wash and dry 6 8-ounce ball jars along with their lids. Set the jars right-side-up in a baking sheet and hold them in an oven at 225°F for at least 20 minutes to sterilize. Leave the jars in the oven until you're ready to fill them, because adding hot jam to cool jars is a recipe for disaster. (Note: Yes, some believe that you don't need to pre-sterilize jars, but I do it anyway.)
- Place the pot over medium heat. Your jam will now go through a few phases of cooking that will take around 30-45 minutes of cooking start-to-finish. The first stage is the pre-boil phase where the mixture will get very wet and loose, your sugar will melt, and the fruit will release more juice.
- The second stage is the foaming phase. The jam will start giving up a mucky, thick foam. Take a wide, shallow spoon and skim the foam off the top. The foam is just excess sugars and proteins that are being cooked off. They’re harmless to the jam, but do cause it to look cloudy and unappetizing. I always place the foam in a container in the fridge and add it to smoothies, waffles, or ice cream.
- Eventually the foaming will subside and give way to a more regular-looking boil. This is the boil stage. Now you must be attentive. Continuously stir the mixture as this will ensure that the fruit and sugar don’t sit and scald on the bottom of the pan. This process is cooking off the excess water and encouraging the sugar to reach a gel point.
- The boil will soon slow down. Instead of lots of small bubbles, like in a simmer, you should see larger bubbles that struggle to the surface a bit as the mixture thickens. If you pull a spoon quickly across the bottom of the pot the jam should take a moment to catch up and fill in the trailing space behind your spoon, possibly making a sucking/scratching sound as it does. This is the jam stage! Once your jam is here, you’re done!
- Place hot jam into warm jars, leaving 1/4" of head room. Either process in a water bath or allow to cool and store in the fridge for up to two weeks.
Notes
Jars can be sterilized by being run through a dishwasher, being boiled in water for 10 minutes, or heated in an oven set at 200°F (93°C) for 10 minutes. Sterilized jars help ensure your jam doesn’t go funky.
This content was originally posted on FearlessFresh.com.
Nutrition
Serving: 2tablespoons | Calories: 303kcal | Carbohydrates: 79g | Protein: 1g | Sodium: 2mg | Fiber: 4g | Vitamin A: 150IU | Vitamin C: 5.8mg | Calcium: 40mg | Iron: 0.5mg