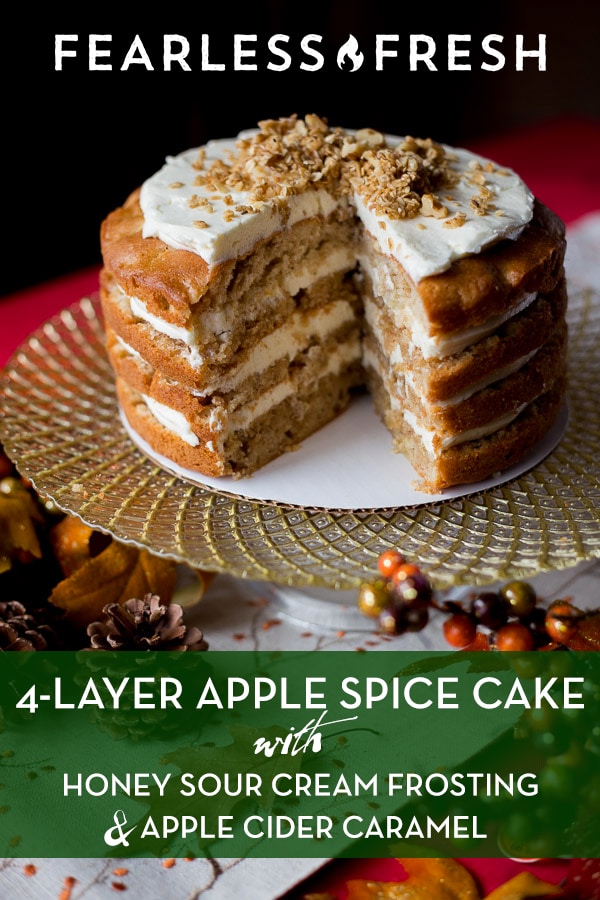
I have a gamelife-changing apple spice cake recipe for you. Why will it change your life? Let me spell it out for you:
- Honey sour cream Swiss buttercream icing. We’re talking the silkiest, most lusciously honey-kissed icing with a touch of tart flavor from the sour cream.
- Hard apple cider caramel syrup soaked into the layers.
- Toasted honey walnut and oat crumble topping for a lovely crunch.
- Not-too-sweet apple spice cake with chunks of baked cinnamon apple. HELLO.
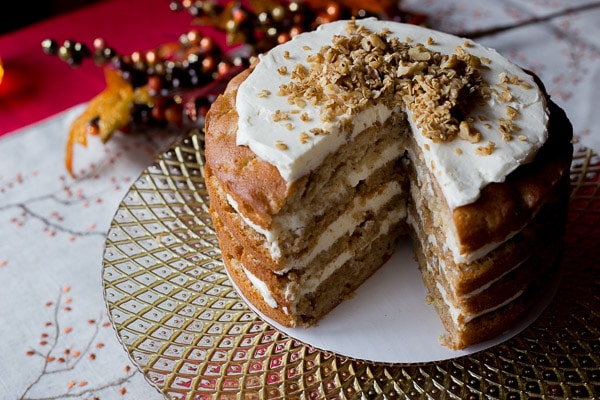
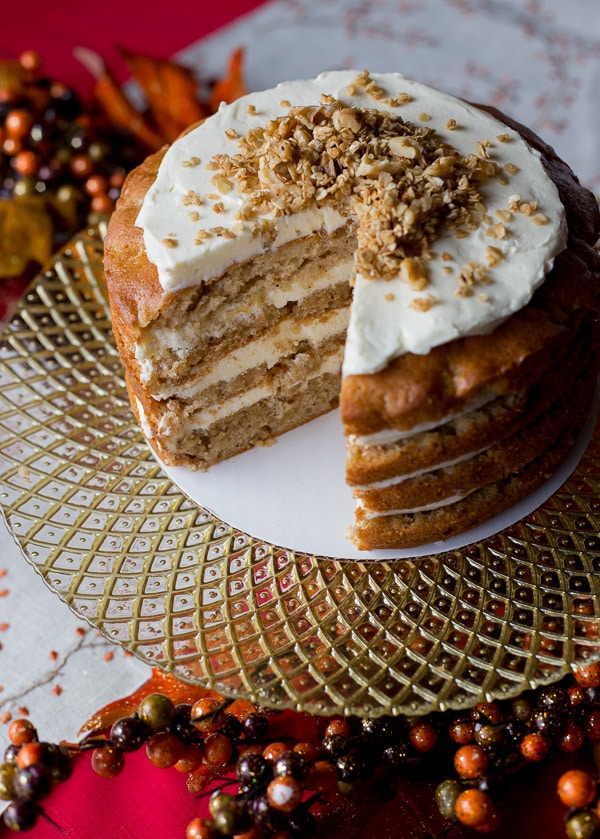
- In case you missed the photo, let me state this outright: IT HAS FOUR LAYERS. Just look at this baby:
Apple spice cake recipe from Layered
I found this apple spice cake recipe in a cookbook I recently picked up called Layered: Baking, building, and styling spectacular cakes, by pastry chef Tessa Huff. I know I recently complained about my cookbook boredom in this post about this gorgeous Chinese red-braised pork recipe, but a few books have come out recently that I found truly inspiring. Layered is one of them.
Seriously, if you at all aspire to peak cake nerdiness, you have to have this book. It’s not only beautiful and full of incredible cake photography, but also the ideas she’s got in here are wonderful. It’s definitely one of the more creative baking books I’ve ever read. And I’ve read A LOT of baking books.
While flipping through Tessa’s book, I found an Honey Apple Cake recipe that sounded heavenly. But, being one to futz, I played with the recipe a few times until I had something a little different. I added a few more spices to the cake itself (it is an apple spice cake recipe, after all) and played with the fats just a touch, then pulled an apple cider caramel recipe from elsewhere in the book, turning it into a syrup to brush on each cake layer. I used her honey sour cream buttercream and oat/walnut crumble pretty much as-is, adjusting a touch to bring out the flavors I liked best.
The original recipe is an absolute winner, for sure. The resulting modified apple spice cake recipe I came up with is official my new favorite thing about the holiday. (And, as it turns out, it’s also the new holiday favorite of everyone who came over to try it.)
The perfect, stick-free cake pans
I’d also like to share one of my pastry chef secrets of cake baking, which pretty much guarantees that your cakes won’t get stuck in the pan ever again. Tender cakes, like this apple spice cake recipe, can sometimes be a bugger to get out of a cake pan if it’s not properly greased. The secret is… cake pans with no bottom. Or, pans where you can take the bottom out.
I can hear the gasps from the audience, and a few of you may be wondering if I’m hitting the sauce. No sauce here, my friend, at least not this early in the morning. The cake pans I worked with in culinary school were not cake pans at all, but rather cake rings with no bottom whatsoever.
There is no gravity-defying trickery here. Cake rings actually work quite well and hold your batter in place just like a regular cake pan would. You simply grease the ring, place it on a baking sheet lined with parchment, pour in the batter, and bake. Cake batter tends to be thick, so it doesn’t flow out from under the edges of the ring. And once the cake is done, you just pop off the ring. Super easy.
Cheesecake pans — a great middle ground
Cake rings may seem a little intense for some folks, and so there’s actually a middle ground: the cheesecake pan. This is not a springform pan (there are no springs to be found here) but rather a regular cake pan with a removable bottom. Again, cake batter is too thick to seep out the bottom, and in fact the weight of the batter holds the bottom in place. So you just grease up the pan, slap a parchment circle on the bottom, pour in your batter, and bake. Done.
I love the hybrid cheesecake pan, especially for things like this uber-tender apple spice cake recipe, because it prevents sticking just as much as a cake ring. Once your cake cools, you just push your hand up through the bottom and voila, cake! But because it still has a bottom, you can move the pan around easily. With cake rings, you’re pretty much committed to wherever the ring was when you poured in the batter. So if you discover your baking sheet is warped or won’t fit in your oven… you’ve got some fun times on your hands.
Plus I’ve had my Fat-Daddio cheesecake pans for going on 15 years now, and they’re still in perfect shape. Can’t beat that for lasting quality.
I hope you enjoy this apple spice cake recipe, with its luscious buttercream and unfairly sinful caramel syrup. It makes a perfect cake for the holidays, or really, for any occasion where you want to both impress and spoil your guests.
A note on affiliate links
Note: some of the links in this post are affiliate links. If you click them and make a purchase, I’ll get a very small percentage of the purchase price. Thanks for helping me keep the lights on and pay my cookbook storage bill.

Apple Spice Cake Recipe with Cider Caramel, Honey Sour Cream Frosting, and Toasted Oat Crumble
Ingredients
Apple Spice Cake
- Butter for greasing the pan
- 2 1/2 cups all purpose flour
- 2 teaspoons baking powder
- 1/2 teaspoon baking soda
- 1/2 teaspoon salt
- 1/2 teaspoon cinnamon
- 1/2 teaspoon ground ginger
- 1/4 teaspoon ground cardamom
- 1/4 teaspoon ground clove
- 1/4 teaspoon ground nutmeg
- 1/2 cup vegetable oil
- 1 1/4 cups sugar
- 2 teaspoon finely grated lemon zest
- 2 large eggs
- 1 egg yolk
- 1/2 cup plus 2 tablespoons buttermilk
- 2 cups finely chopped and peeled Granny Smith apples
Honey Sour Cream Buttercream
- 3/4 cup large egg whites (about 6), at room temperature
- 1 1/4 cup sugar
- 1 1/2 cups unsalted butter at room temperature and cut into cubes.
- 1 teaspoon vanilla extract
- 1 cup sour cream at room temperature
- 1/4 cup honey
- 1/2 teaspoon salt
Hard Apple Cider Caramel Syrup
- 1 1/2 cups (12 ounces) hard apple cider (apple juice will work, too)
- 1/2 cup firmly packed brown sugar
- 1 teaspoon corn syrup
- 3 tablespoons unsalted butter
- 1/4 teaspoon salt
Oat Crumble
- 1 cup instant rolled oats
- 1/2 cup chopped walnuts
- 3 tablespoons honey
- 2 tablespoons unsalted butter
- 1/4 teaspoon nutmeg
- 1/4 teaspoon cinnamon
- 1/4 teaspoon salt
Instructions
Apple Spice Cake
- Preheat the oven to 350°F (176°C). Grease two 8-inch cake pans and fit the bottom of each with a parchment round. Trust me, don’t skip the parchment step or your cake may stick to the bottom of the pan. (Apples like to ooze sugary syrup while baking!)
- Sift together flour, baking powder, baking soda, salt, and spices into a bowl.
- Fit your stand mixer with the paddle attachment. In the bowl of a stand mixer, combine oil, sugar, and lemon zest. Mix on medium for 2 minutes. Add eggs and yolk one at a time, mixing until well combined. If necessary, pause the mixer and scrape down the sides of the bowl.
- Turn the mixer to low and add 1/3 of the flour-spice mixture. Allow to mix a few seconds and add half of the buttermilk. Allow to mix for another few seconds and add another 1/3 of the flour. Follow with the remaining buttermilk, and finally with the remaining flour. Mix just until the final bits of flour vanish and stop the mixer immediately. Do not over-mix or your finished cake will tighten up like a rubber band ball.
- Gently fold in the diced apples with a large, flat spatula. Divide the batter between the two greased cake pans and use your spatula to gently level the top of the batter.
- Bake for 24-26 minutes, rotating the cakes after 15 minutes. The cakes are done when they begin to pull away from the side of their pans and a toothpick inserted in the middle comes out clean. For you temperature nerds out there (*raises hand*) the temperature of the very center of the cake should be 205°F (96°C).
- Remove the cakes from the oven. Allow cakes to cool in the pans for 15 minutes on a wire rack. Gently remove the cakes from the pans and allow them to cool completely. Once the cakes are completely cool, wrap them in plastic and place them in the refrigerator for at least 1 hour.
Honey Sour Cream Buttercream
- Important note: Pull your sour cream and butter out of the fridge a few hours before you need them. Seriously, cold butter simply will not beat. And cold sour cream (even slightly cool) will cause your buttercream to break. It will eventually come together as the sour cream warms up while mixing, but you will end up having to beat the whole thing within an inch of its life before it smooths out.
- Place the egg whites and sugar in the bowl of your stand mixer. Whisk by hand for a few seconds, just until combined.
- Fill a medium saucepan with a few inches of hot water and bring to a boil over medium heat. Set the mixer bowl in the pot to create a double boiler. Don’t let the water touch the bottom of the bowl — pour some out if you have to. Set the thermometer in the whites and sugar.
- Whisking every few seconds, heat the whites and sugar to 160°F (71°C). Once it’s at the correct temperature, dry the bottom of the bowl and immediately set the bowl into its setting on the stand mixer.
- Attach the whip attachment to the mixer and beat on high speed for 8-10 minutes, or until the whites form stiff peaks and the bowl feels completely cool to the touch. Not warm, not kinda-warm, but completely room temp. (Lest your butter melt into a greasy pool and your buttercream reenacts the BP oil spill. ?)
- Remove the whip attachment and add the paddle attachment. With the mixer on low speed, add the vanilla extract. Add the butter one or two cubes at a time, waiting a few seconds between each addition. Once all the butter has been added, turn the speed to medium-high and beat for 3-5 minutes, until the icing is super smooth. It may look a little broken at some point, but keep beating and it will come together. (Your butter was completely at room temperature, right??)
- Add sour cream, honey, and salt. Mix on high until combined. Assuming your sour cream was completely at room temperature, it should come together in a few minutes. If your sour cream was a little cold, the buttercream may look broken while mixing. Just keep mixing and it will eventually come together.
- Just before you’re ready to use it, divide the buttercream into 4 equal portions. You can totally eyeball it, but a scale works great if you want to be more accurate: Set a large piece of parchment on the scale and dollop about a quarter of the buttercream onto it, then do that 3 more times. Make sure they all weigh the same. Using bowls or Tupperware containers will make it a bite more complicated, unless all four are the exact same size and weight.
Hard Apple Cider Caramel Syrup
- Place the apple cider or juice in a small pot and bring it to a boil over medium heat. Reduce the heat to low and simmer for 5 minutes.
- Add the brown sugar, corn syrup, and salt. Raise the heat to medium and cook until the caramel syrup reaches 240°F (115°C), trying to not agitate or stir it. Remove from heat and stir in the butter. Allow the syrup to cool before using it to brush the cake layers.
Oat Crumble
- Heat a heavy skillet over medium heat. Add the oats and walnuts, stirring with a wooden spoon every few seconds until they begin to toast. The oats will begin to deepen in color and the walnuts will smell super fragrant. This should take about 5-6 minutes, but do not walk away during this step. The oats and nuts will go from perfectly toasted to blacker than the depths of hell in less than a few seconds. If you get even a whiff of burnination, immediately move the pan to a cool burner for a few seconds.
- Once the oats and walnuts are nice and fragrant, add the honey, butter, nutmeg, cinnamon, and salt. Stir so that the butter melts and the oats coat evenly. Stir constantly and cook another 3-5 minutes.
- Remove from heat and spread mixture out onto a piece of parchment to cool completely. Once totally cool, pour into an airtight container and store in the fridge. Be sure to allow the oats and nuts to cool completely, or they will get soggy in the container. Not only will they lose the gorgeous crunch you just created, they will also potentially mold.
- BTW, any leftovers of this stuff are great stirred into cereal, yogurt, or anything else that sounds tasty.
Assembling the Apple Spice Cake Recipe
- Use a long, sharp, serrated knife or one of these cake-cutter thingies to divide each cake horizontally into two equal layers. Pick the prettiest top and set it aside to be the top of your cake. Take the remaining less-pretty top and flip it over. This will be the bottom of your cake. *Note: if one of your layers breaks or cracks, make sure this layer goes in the middle of the cake.
- Set the bottom layer of cake on a cardboard cake round or on plate large enough to accommodate it. The cut side should be facing up. Using a clean pastry brush, brush a generous amount of caramel syrup on the top of the layer. You want to be generous but you don’t want to make it soggy, so be smart about it. Take 1/4 of the buttercream frosting and drop it into the middle of your cake layer. Use an offset spatula or a large spoon to spreading it evenly out to the edges of the cake.
- Set the next layer of cake on top of the frosted layer, with the cut side facing up. Position it so that it’s straight and not hanging more over one side or the other. Repeat the brushing of the syrup and the spreading of another 1/4 of the buttercream.
- Set the third layer on top of the newly frosted second layer, cut side up, and straighten it out. Repeat the brushing of the syrup and spreading of another 1/4 of the buttercream.
- Now for the top. Grab the pretty top you’ve set aside and place it on top of the cake. Straighten it out. Set the remaining 1/4 that’s left of the buttercream in the middle of cake and carefully smooth it out to just about the edges, but not quite. This is the top of your cake, so try to be neat and tidy.
- Sprinkle the top of the cake with the toasted crumble, making a larger pile in the middle and scattering it less heavily closer to the edges of the icing. This will make it more attractive. (See photos.)
- Serve your apple spice cake immediately or cover carefully and store in the fridge. (See head-note for more info on making it the day before.)
Notes
Two 8-inch cake pans
Two 8-inch round pieces of parchment (instructions for cake rounds here)
One 8-inch cardboard cake round, which will make moving the thing WAY easier
One candy thermometer (or any kitchen thermometer that goes between 160°F (71°C) and 240°F (115°C).
Nutrition
This content was originally posted on FearlessFresh.com.


